There’s a quiet elegance to desserts that require no oven yet deliver impressive flavor, texture, and visual appeal. These no bake chia pudding bars are a perfect example—wholesome, layered, and beautifully satisfying with every bite.
Crafted with nutrient-dense ingredients, this recipe blends creamy chia pudding with a subtly sweet base, creating a balanced dessert that feels indulgent yet nourishing. It’s the kind of treat that fits seamlessly into both everyday snacking and mindful eating routines.
What truly sets these bars apart is their versatility. They can be customized with different flavors, toppings, and textures, allowing you to tailor each batch to your personal taste or seasonal ingredients.
Whether you’re looking for a quick make-ahead snack, a healthy dessert option, or a visually appealing addition to your table, these no bake chia pudding bars deliver exceptional results with minimal effort.
Ingredients You’ll Need
Imagine creating a dessert that feels luxurious, layered, and satisfying—without ever turning on your oven. That’s the beauty of this recipe.
One of the things I love about this recipe is that it uses simple pantry ingredients. You probably already have most of them in your kitchen.
Base Ingredients:
- 1 cup rolled oats
- 1/2 cup almond butter
- 1/4 cup honey
- 2 tablespoons coconut oil (melted)
- 1 cup milk (dairy or plant-based)
- 3 tablespoons chia seeds
- 1 teaspoon vanilla extract
- 2 tablespoons maple syrup
Optional Add-ins:
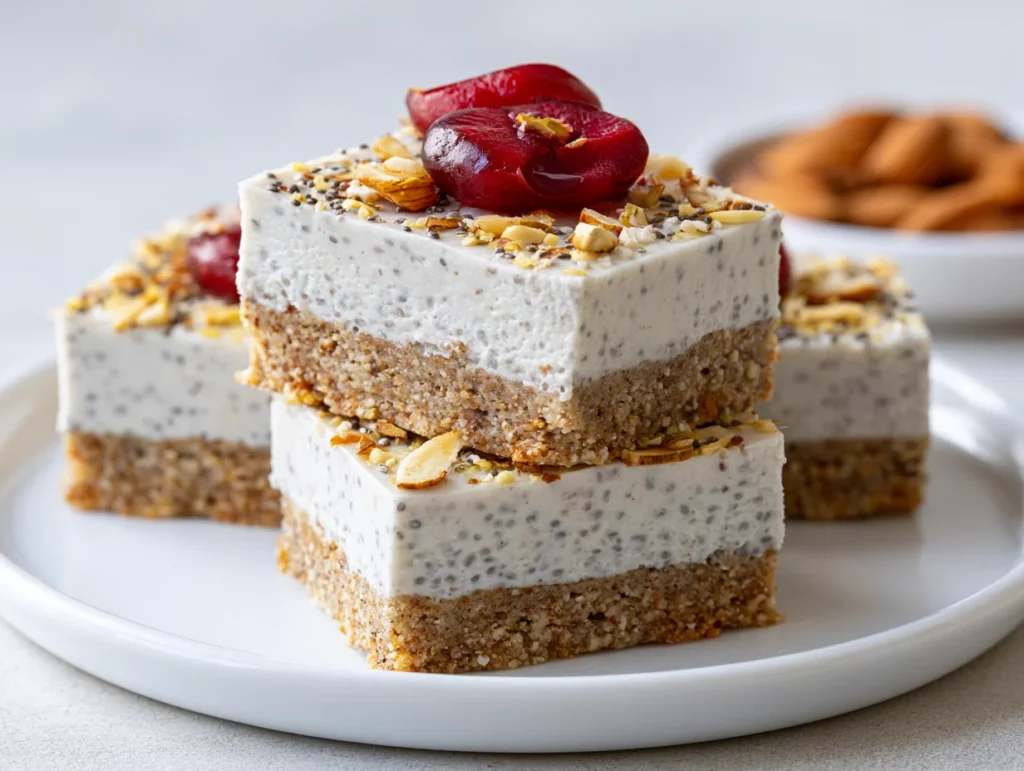
- 1/2 cup fresh berries
- 1/4 cup dark chocolate chips
- 2 tablespoons shredded coconut
- 1 tablespoon chopped nuts
Step-by-Step Instructions
Prepare the Base Layer
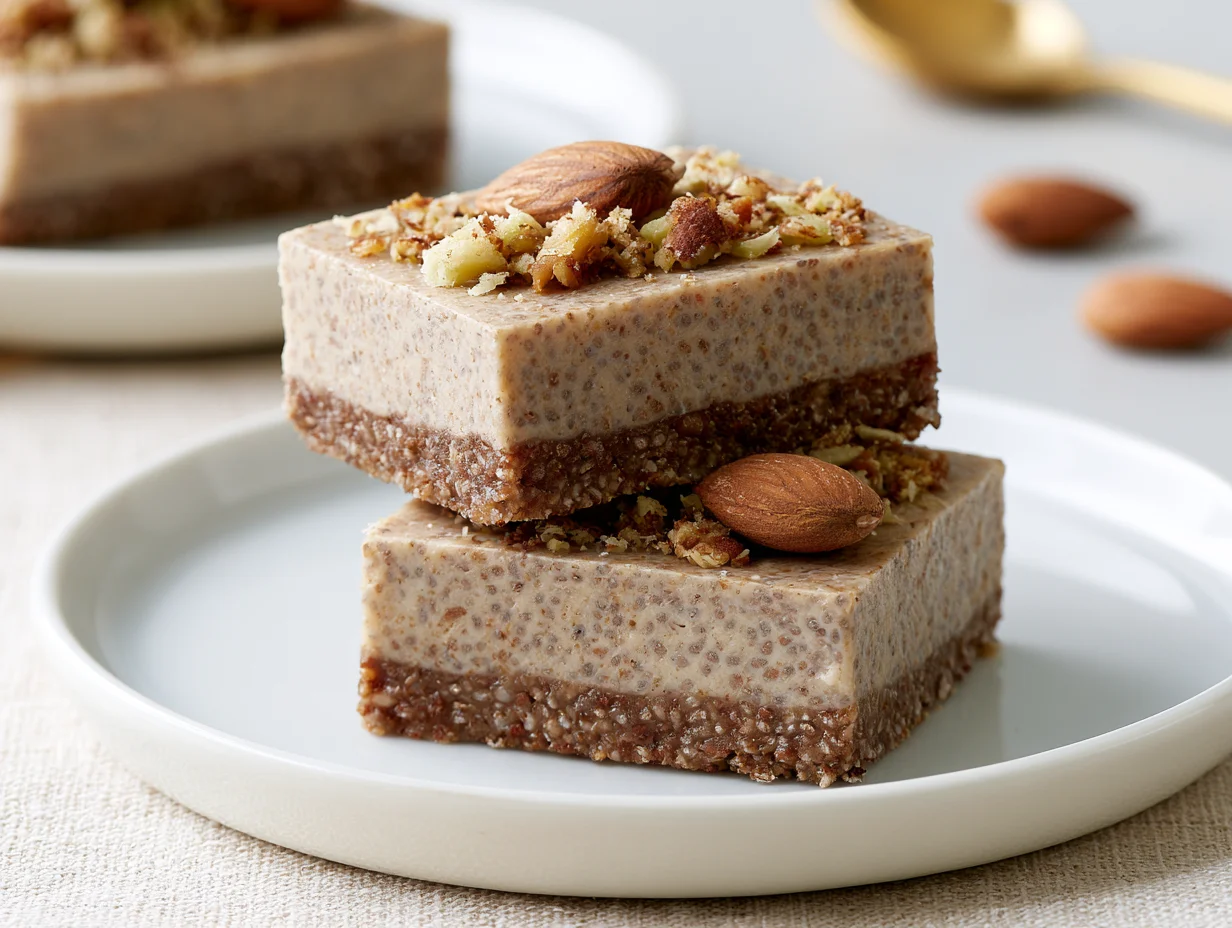
Start by combining rolled oats, almond butter, honey, and melted coconut oil in a mixing bowl. Stir until the mixture becomes sticky and cohesive, ensuring all ingredients are evenly distributed. Press this mixture firmly into a lined baking dish, creating a compact and even base. Use the back of a spoon or a flat-bottomed glass to smooth it out. This layer forms the foundation of your bars, so take a moment to ensure it’s tightly packed for clean slicing later.
Make the Chia Pudding
In a separate bowl, whisk together milk, chia seeds, vanilla extract, and maple syrup. Stir thoroughly to prevent clumping and allow the mixture to sit for 5 minutes. Stir again to ensure even distribution of chia seeds. Let it rest for another 10–15 minutes until it thickens into a pudding-like consistency. This step is essential for achieving the creamy, structured layer that sits perfectly on top of the base.
Assemble the Layers
Pour the prepared chia pudding evenly over the oat base, spreading it gently with a spatula to create a smooth and level surface. If using optional add-ins like berries or chocolate chips, sprinkle them evenly across the top. Press them lightly so they adhere to the pudding layer. This step allows for creativity while enhancing both texture and visual appeal.
Chill and Set
Place the assembled dish in the refrigerator and allow it to chill for at least 2–3 hours, or until fully set. Once firm, remove from the dish and slice into neat bars using a sharp knife. Wipe the blade between cuts for clean edges. Serve chilled for the best texture and flavor experience.
Cook Time
Total:
3 hours
Prep:
15 minutes
Bake:
0 minutes
Servings
This recipe makes approximately 10 to 12 chia pudding bars, depending on how you portion them. It’s an ideal quantity for meal prep or sharing with family.
The bars can be cut into smaller portions for snack-sized servings or larger squares for a more filling dessert option. This flexibility makes them highly practical.
Makes approximately enough to serve 4 to 6 people comfortably, depending on portion size and serving style.
Common Mistakes in This Recipe
One common mistake is not allowing enough time for the chia pudding to thicken, resulting in a runny and unstable layer.
Another issue is failing to press the base firmly, which can cause the bars to crumble when sliced.
Using too much liquid can also affect the consistency, making the pudding layer too soft.
Skipping proper chilling time often leads to bars that don’t hold their shape well.
Solutions to Common Mistakes
Allow the chia mixture to rest properly and stir intermittently to ensure even thickening.
Press the base layer firmly and evenly to create a solid foundation for the bars.
Measure liquids accurately to maintain the correct consistency in the pudding layer.
Always chill for the recommended time to achieve firm, sliceable bars.
Nutritional Information (approx. per serving)
- Calories: 180–220 kcal
- Carbohydrates: 20g
- Protein: 5g
- Fat: 9g
- Fiber: 6g
Chia seeds are rich in omega-3 fatty acids, supporting heart health and overall wellness.
The oats provide sustained energy through complex carbohydrates, making these bars ideal for snacks.
Natural sweeteners like honey and maple syrup offer a more balanced sweetness compared to refined sugar.
The combination of fiber and healthy fats helps promote fullness and steady energy levels throughout the day.
Storage Instructions
Store the bars in an airtight container in the refrigerator for up to 5 days. This keeps them fresh and maintains their texture.
Keep layers separated with parchment paper to prevent sticking and preserve presentation.
For longer storage, freeze the bars for up to 1 month and thaw before serving.
Always store chilled, as the pudding layer softens at room temperature.
Suggestions
Add a layer of yogurt or fruit puree for extra flavor and visual appeal.
Experiment with different nut butters like peanut or cashew for variation.
Top with granola for added crunch and texture contrast.
Serve chilled with a drizzle of honey or melted chocolate for a more indulgent touch.
Seasonal Relevance
These bars are perfect year-round due to their no-bake nature and adaptable ingredients.
In summer, they offer a refreshing, chilled dessert option that requires no oven.
During colder months, they provide a wholesome and satisfying snack.
Seasonal fruits can be added to match the time of year for variety.
Final Words
No bake chia pudding bars are a perfect blend of convenience, nutrition, and flavor.
They offer a modern approach to dessert that feels both indulgent and mindful.
With minimal effort and maximum flexibility, they fit seamlessly into any lifestyle.
Once you try them, they’re sure to become a regular addition to your recipe collection.
Frequently Asked Questions
Can I use a different type of milk for this recipe?
Yes, you can use any milk of your choice, including almond, soy, oat, or dairy milk. Each option slightly changes the flavor and texture, but all work well. Choose based on dietary preference and desired creaminess.
How do I know when the chia pudding is ready?
The pudding is ready when it thickens to a gel-like consistency and holds its shape when stirred. It should not appear watery. Proper resting time and occasional stirring ensure even absorption and ideal texture.
Can I make these bars vegan?
Absolutely. Simply replace honey with maple syrup or agave, and use plant-based milk. The rest of the ingredients are naturally vegan-friendly, making this recipe easy to adapt without compromising taste or texture.
No Bake Chia Pudding Bars Recipe
15
minutes220
kcalThese no bake chia pudding bars are creamy, nutritious, and easy to make. With a soft oat base and rich chia layer, they’re perfect for healthy snacking, meal prep, or a light dessert—no oven required.
Ingredients
1 cup rolled oats
1/2 cup almond butter
1/4 cup honey
2 tablespoons coconut oil (melted)
1 cup milk (dairy or plant-based)
3 tablespoons chia seeds
1 teaspoon vanilla extract
2 tablespoons maple syrup
1/2 cup fresh berries (optional)
1/4 cup dark chocolate chips (optional)
2 tablespoons shredded coconut (optional)
1 tablespoon chopped nuts (optional)
Directions
- In a bowl, mix oats, almond butter, honey, and melted coconut oil until combined.
- Press the mixture firmly into a lined dish to form the base layer.
- In another bowl, whisk milk, chia seeds, vanilla, and maple syrup.
- Let the mixture sit, stirring occasionally, until thickened.
- Pour chia pudding evenly over the base layer.
- Add optional toppings like berries or chocolate chips.
- Refrigerate for 2–3 hours until fully set.
- Slice into bars and serve chilled.
Notes
- Allow enough chilling time for proper setting and clean slicing.
- Stir chia mixture well to prevent clumps.
- Press the base firmly to avoid crumbling.
- Store chilled to maintain texture and freshness.