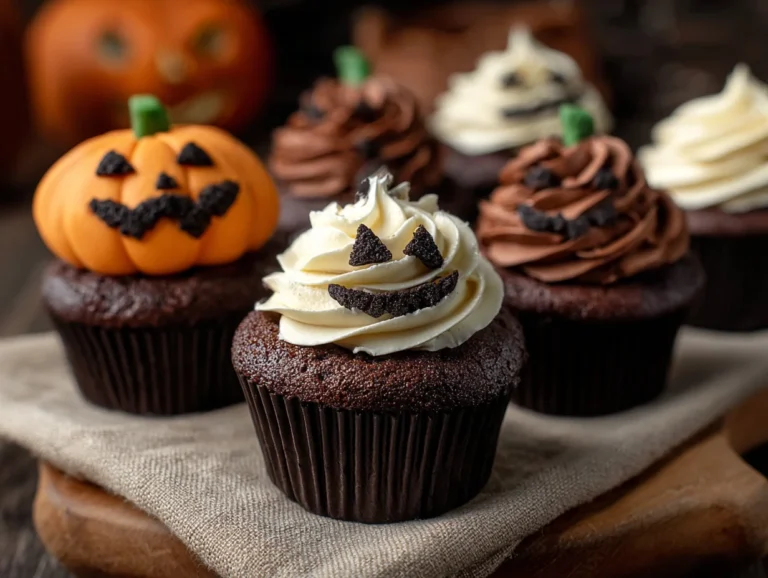

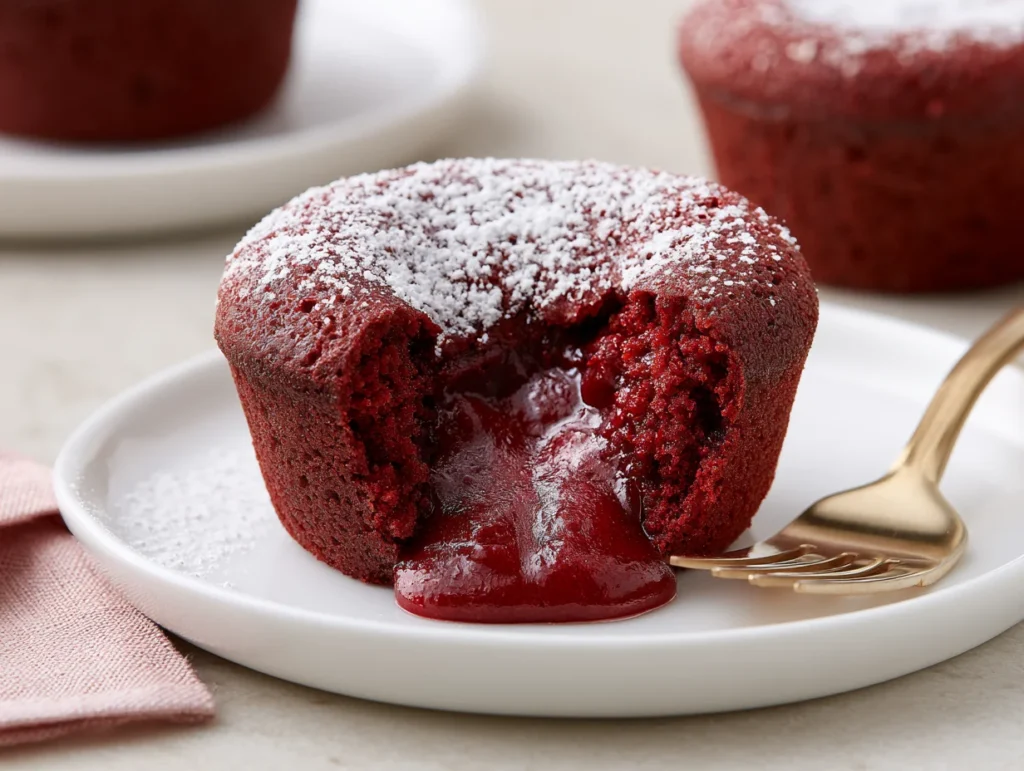
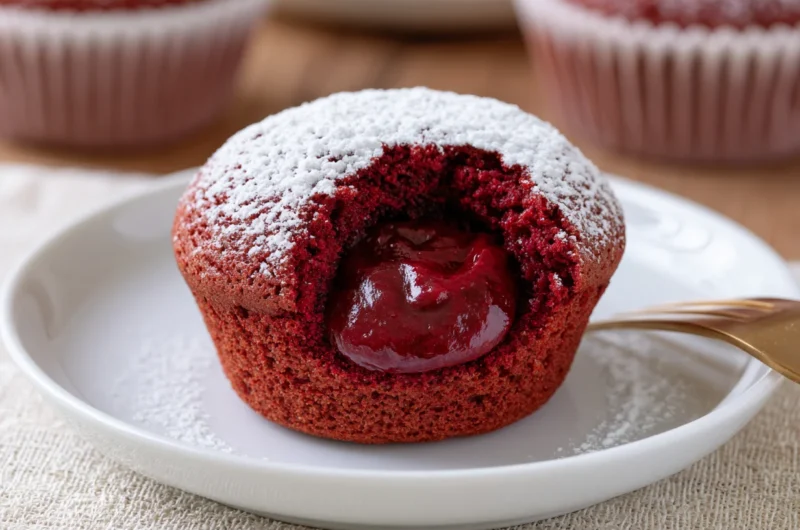
There’s something irresistibly indulgent about cutting into a cupcake and watching a rich, velvety center flow out like molten silk. These molten red velvet lava cupcakes deliver that exact moment—luxurious, dramatic, and deeply satisfying. They’re the kind of dessert that feels like a restaurant-quality experience, yet they’re surprisingly achievable at home.
Red velvet, with its subtle cocoa notes and signature tang, offers a refined flavor profile that goes beyond ordinary chocolate desserts. Paired with a warm, gooey center, it transforms into a multi-layered treat that appeals to both texture and taste. Every bite balances softness with richness.
What makes this recipe truly special is its versatility. Whether you’re planning an elegant dinner party or simply craving a cozy dessert, these cupcakes rise to the occasion beautifully. They look impressive, but the process is straightforward.
With the right timing and a few expert tips, you’ll create a dessert that feels indulgent, looks stunning, and tastes unforgettable—every single time.
Ingredients You’ll Need
A perfectly balanced dessert starts with thoughtful ingredients—each one playing a role in creating that signature soft crumb and molten center.
One of the things I love about this recipe is that it uses simple pantry ingredients. You probably already have most of them in your kitchen.
Base Ingredients:
- 1 cup all-purpose flour
- 1 tablespoon unsweetened cocoa powder
- 1/2 teaspoon baking soda
- 1/4 teaspoon salt
- 1/2 cup unsalted butter, softened
- 3/4 cup granulated sugar
- 2 large eggs
- 1 teaspoon vanilla extract
- 1/2 cup buttermilk
- 1 tablespoon red food coloring
Optional Add-ins:
- 1/2 cup white chocolate chips
- 1/4 cup cream cheese cubes
- 2 tablespoons dark chocolate chunks
- 1 tablespoon espresso powder
Step-by-Step Instructions
Prepare the Batter
Begin by preheating your oven to 180°C (350°F) and lining a muffin tin with cupcake liners. In a bowl, whisk together flour, cocoa powder, baking soda, and salt until evenly combined. In a separate mixing bowl, cream butter and sugar until light and fluffy. Add eggs one at a time, beating well after each addition, then mix in vanilla extract. Alternate adding dry ingredients and buttermilk into the batter, starting and ending with dry ingredients. Finally, gently fold in the red food coloring until you achieve that iconic vibrant hue.
Create the Lava Center
To achieve that molten core, scoop a small amount of batter into each liner, filling about halfway. Add a small piece of cream cheese or chocolate into the center. Cover with more batter, ensuring the filling is completely enclosed. This layering technique is key—it ensures the filling melts perfectly while the outer cake sets. Avoid overfilling, as the cupcakes need space to rise slightly without overflowing during baking.
Bake to Perfection
Place the cupcakes in the preheated oven and bake for 12–15 minutes. Timing is critical here. You want the edges to be set while the center remains soft and molten. Check by gently pressing the top—it should feel firm but still have slight give. Avoid overbaking, as this will solidify the center. Once done, remove from the oven and let them rest for 3–5 minutes to stabilize before serving.
Serve Warm
Serve these cupcakes while still warm to enjoy the molten center at its best. Carefully peel back the liner or plate them directly. For an elevated presentation, dust lightly with powdered sugar or add a dollop of whipped cream. The contrast between the warm, gooey interior and soft cake exterior creates an unforgettable dessert experience that feels indulgent and refined.
Cook Time
Total:
Approximately 30 minutes
Prep:
15 minutes
Bake:
12–15 minutes
Servings
These molten red velvet lava cupcakes are designed to serve small gatherings while still delivering a luxurious dessert experience. Makes approximately 8 to 10 cupcakes, depending on portion size and liner capacity.
Each cupcake is rich and satisfying, so even one serving feels indulgent. This makes them ideal for intimate dinners, celebrations, or special weekend treats.
If you’re serving a larger group, the recipe can easily be doubled without compromising texture or flavor. Just ensure consistent baking times for even results.
Common Mistakes in This Recipe
One common mistake is overbaking the cupcakes. Even an extra minute in the oven can eliminate the molten center, turning the dessert into a standard cupcake rather than a lava-style treat.
Another issue is improper filling placement. If the filling isn’t fully enclosed within the batter, it may leak out during baking, affecting both texture and presentation.
Using cold ingredients can also lead to uneven batter consistency. This prevents proper mixing and can result in dense or unevenly baked cupcakes.
Lastly, incorrect measurements—especially flour—can alter the texture significantly. Too much flour makes the cupcakes dry, while too little affects structure and rise.
Solutions to Common Mistakes
To avoid overbaking, start checking at the 12-minute mark. Remove the cupcakes as soon as the edges are set and the center remains soft to the touch.
Ensure the filling is completely covered with batter. Use a spoon to gently seal the top layer, preventing leaks during baking.
Always use room temperature ingredients. This helps create a smooth, cohesive batter that bakes evenly and maintains a soft texture.
Measure ingredients accurately using proper measuring tools. Level off dry ingredients and avoid packing flour to maintain the correct balance.
Nutritional Information (approx. per serving)
- Calories: 280 kcal
- Carbohydrates: 34g
- Protein: 4g
- Fat: 14g
- Sugar: 20g
These cupcakes provide a comforting energy boost thanks to their balanced combination of carbohydrates and fats. The cocoa adds a mild dose of antioxidants, contributing to overall indulgence with a slight nutritional edge.
The inclusion of buttermilk supports better digestion and adds a subtle tang that enhances flavor complexity without increasing heaviness.
Using high-quality chocolate or cream cheese filling introduces calcium and essential fats, which contribute to satiety and satisfaction.
When enjoyed in moderation, this dessert can be part of a balanced lifestyle, offering both emotional comfort and a moment of culinary pleasure.
Storage Instructions
Allow the cupcakes to cool completely before storing. Placing warm cupcakes in a container can trap moisture and affect their texture.
Store in an airtight container at room temperature for up to 2 days. This keeps the exterior soft while preserving the overall flavor.
For longer storage, refrigerate for up to 5 days. Reheat gently in the microwave for about 10–15 seconds to restore the molten center.
If freezing, wrap each cupcake individually and store for up to 2 months. Thaw overnight and warm slightly before serving for best results.
Suggestions
Pair these cupcakes with a scoop of vanilla ice cream for a classic hot-and-cold contrast that enhances the molten texture beautifully.
For a more sophisticated twist, add a hint of orange zest to the batter. It complements the cocoa and adds a subtle citrus brightness.
You can also experiment with fillings like caramel or peanut butter for a unique flavor variation that still maintains the lava effect.
Serve on elegant dessert plates with a light dusting of powdered sugar for a professional, bakery-style presentation.
Seasonal Relevance
These cupcakes are especially popular during festive seasons like Valentine’s Day, thanks to their rich color and romantic presentation.
In winter, their warm, gooey center makes them a comforting dessert perfect for cozy evenings and gatherings.
During holidays, they can be dressed up with decorative toppings, making them ideal for celebrations and special occasions.
Even in summer, when paired with chilled cream or ice cream, they offer a delightful contrast that keeps them relevant year-round.
Final Words
Molten red velvet lava cupcakes are more than just a dessert—they’re an experience. From the vibrant color to the flowing center, every element is crafted to impress.
Despite their elegant appearance, they are accessible and rewarding to make at home. With a little attention to detail, you can achieve professional-quality results.
This recipe strikes a balance between simplicity and indulgence, making it a reliable go-to for both beginners and experienced bakers.
Once you master this, it’s a dessert you’ll return to again and again—because few things compare to that perfect molten moment.
Frequently Asked Questions
Can I make the batter ahead of time?
Yes, you can prepare the batter up to 24 hours in advance and store it in the refrigerator. However, allow it to come to room temperature before baking to ensure even cooking and proper texture development for the molten center.
What can I use instead of buttermilk?
You can substitute buttermilk with a mixture of milk and lemon juice or vinegar. Combine 1/2 cup milk with 1/2 tablespoon acid, let it sit for 5 minutes, and use as directed for similar tang and texture.
How do I ensure the center stays molten every time?
The key is precise baking time. Remove cupcakes when edges are set but centers are slightly soft. Also, using fillings like chocolate or cream cheese helps maintain that gooey consistency even after slight cooling.
Molten Red Velvet Lava Cupcakes Recipe
15
minutes15
minutes280
kcalThese molten red velvet lava cupcakes feature a soft, cocoa-kissed crumb with a rich, gooey center. Elegant yet easy to make, they deliver a bakery-style dessert experience perfect for special occasions or indulgent everyday treats.
Ingredients
1 cup all-purpose flour
1 tablespoon unsweetened cocoa powder
1/2 teaspoon baking soda
1/4 teaspoon salt
1/2 cup unsalted butter, softened
3/4 cup granulated sugar
2 large eggs
1 teaspoon vanilla extract
1/2 cup buttermilk
1 tablespoon red food coloring
1/2 cup white chocolate chips (optional)
1/4 cup cream cheese cubes (optional)
2 tablespoons dark chocolate chunks (optional)
1 tablespoon espresso powder (optional)
Directions
- Preheat oven to 180°C (350°F) and line a muffin tin with cupcake liners.
- Whisk flour, cocoa powder, baking soda, and salt in a bowl.
- In another bowl, cream butter and sugar until light and fluffy.
- Add eggs one at a time, then mix in vanilla extract.
- Alternate adding dry ingredients and buttermilk, mixing until smooth.
- Fold in red food coloring until evenly combined.
- Fill liners halfway with batter, add filling, then cover with more batter.
- Bake for 12–15 minutes until edges are set but centers remain soft.
- Cool slightly for 3–5 minutes and serve warm for molten effect.
Recipe Video
Notes
- Do not overbake; the molten center depends on precise timing.
- Ensure filling is fully enclosed to prevent leaking.
- Use room temperature ingredients for a smooth batter.
- Serve warm for the best lava texture and flavor experience.