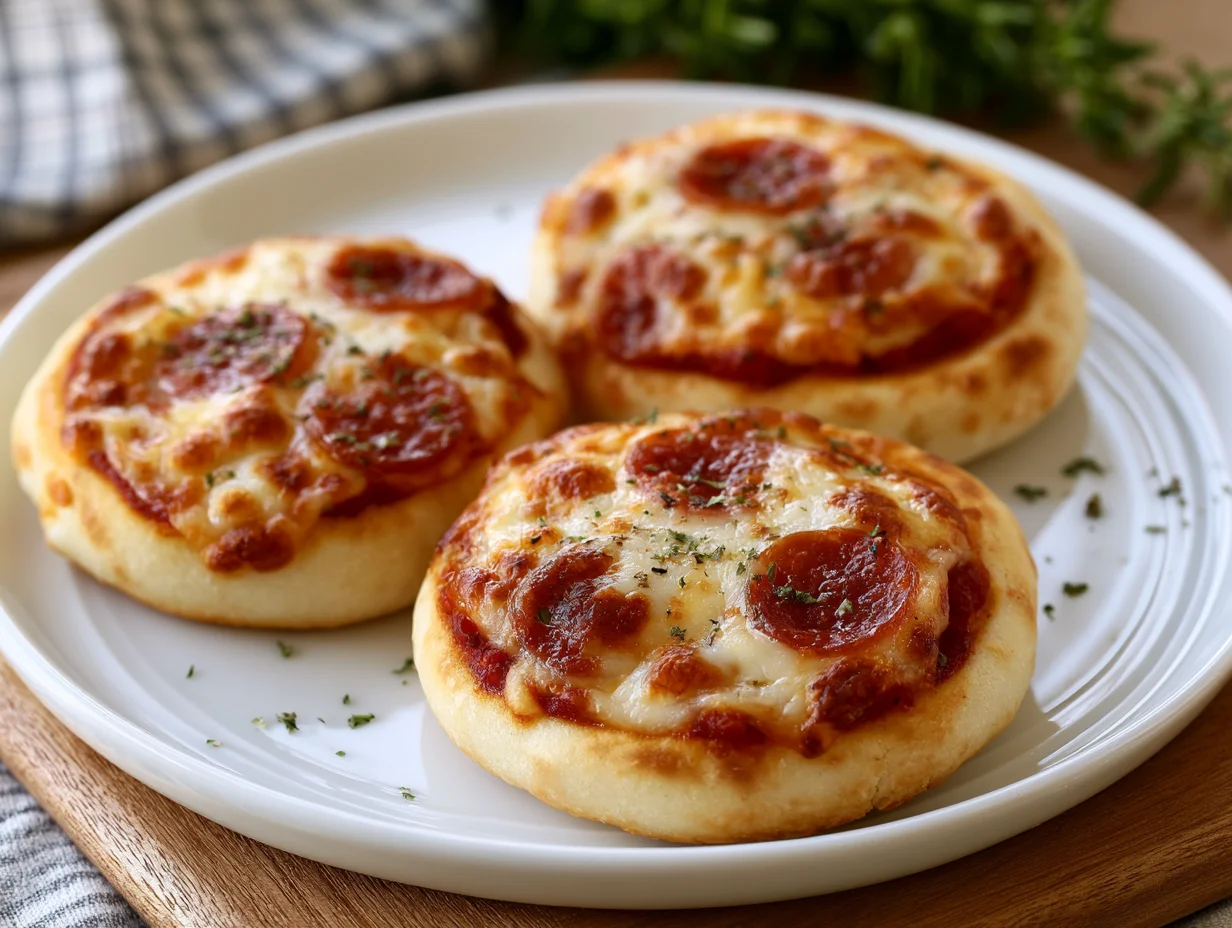
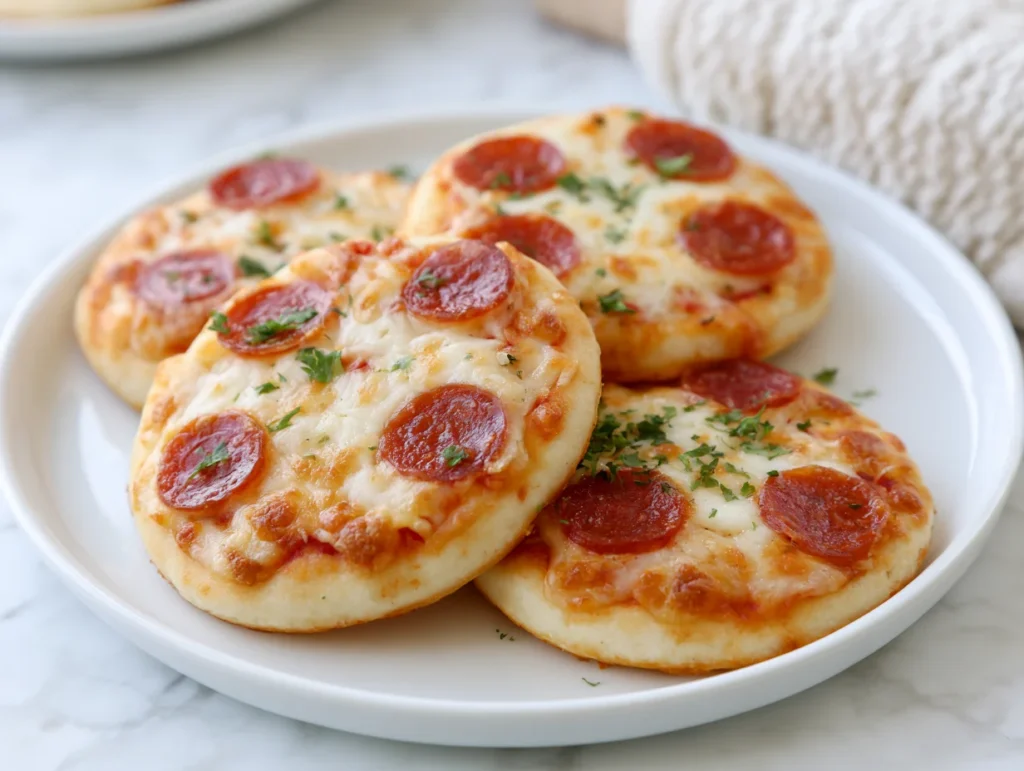
When it comes to quick, fun, and satisfying meals, mini lunchbox pizzas are in a league of their own. They combine everything kids love—melty cheese, soft bread, and rich tomato flavor—into perfectly portioned bites that are easy to make and even easier to enjoy.
These mini pizzas are designed with both parents and kids in mind. They’re simple enough for busy weekdays, yet customizable enough to keep things exciting. Whether packed in a lunchbox or served fresh from the oven, they deliver comfort and convenience in every bite.
What truly sets this recipe apart is its versatility. You can adapt toppings based on preferences, dietary needs, or whatever you have on hand. It’s a practical solution that doesn’t compromise on taste or quality.
If you’re looking for a reliable, crowd-pleasing recipe that feels homemade yet effortless, these mini lunchbox pizzas are a smart and delicious choice for any day of the week.
Ingredients You’ll Need
There’s something undeniably satisfying about transforming simple ingredients into mini pizzas that look fun, taste amazing, and disappear within minutes.
One of the things I love about this recipe is that it uses simple pantry ingredients. You probably already have most of them in your kitchen.
Base Ingredients:
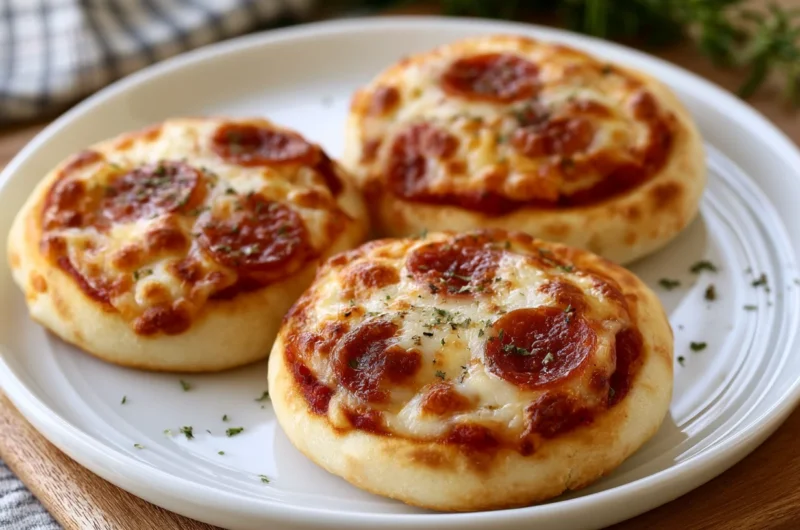
- 6 mini burger buns or English muffins
- 1 cup pizza sauce
- 1½ cups mozzarella cheese, shredded
- 2 tablespoons olive oil
- 1 teaspoon dried oregano
- ½ teaspoon salt
Optional Add-ins:
- ½ cup cooked chicken, shredded
- ½ cup pepperoni slices
- ¼ cup black olives, sliced
- ½ cup bell peppers, finely chopped
- ¼ cup sweet corn
- ½ teaspoon chili flakes
Step-by-Step Instructions
Step 1: Prepare the Base
Preheat your oven to 180°C (350°F). Slice the mini buns or English muffins in half and arrange them on a baking tray. Lightly brush the cut sides with olive oil to prevent sogginess and enhance crispness. This step creates a sturdy base that holds toppings well while delivering a lightly toasted texture after baking. Make sure the pieces are evenly spaced so they bake uniformly without steaming.
Step 2: Add the Sauce
Spread a thin, even layer of pizza sauce over each piece. Avoid overloading, as too much sauce can make the base soft. The goal is to coat the surface while still allowing the bread to maintain structure. Use the back of a spoon to spread smoothly. This layer acts as the flavor foundation, so ensure it’s evenly distributed for consistent taste in every bite.
Step 3: Layer the Cheese and Toppings
Sprinkle shredded mozzarella generously over each base, ensuring full coverage. Add your chosen toppings—chicken, vegetables, or pepperoni—on top of the cheese. Keep toppings finely chopped for easier eating, especially for kids. Balance is key; avoid overcrowding so the pizzas cook evenly. Finish with a light sprinkle of oregano and optional chili flakes for added flavor depth.
Step 4: Bake to Perfection
Place the tray in the preheated oven and bake for 10–12 minutes, or until the cheese is melted and slightly golden. Keep an eye on them toward the end to prevent overbaking. The edges should be crisp while the center remains soft and cheesy. This balance creates the perfect bite—lightly crunchy outside with a warm, gooey center.
Step 5: Cool and Pack
Remove the mini pizzas from the oven and let them cool slightly before serving or packing. Cooling helps the cheese set, making them easier to handle. For lunchboxes, wrap them in foil or place them in an airtight container. They hold their shape well and remain delicious even at room temperature.
Cook Time
Total:
20–25 minutes
Prep:
10–12 minutes
Bake:
10–12 minutes
Servings
This recipe makes approximately 12 mini pizzas, depending on the size of your bread base and how generously you add toppings. Each portion is perfectly sized for small hands, making it ideal for kids.
These mini pizzas are excellent for lunchboxes, after-school snacks, or casual gatherings. Their portion control makes them both practical and appealing.
Makes approximately a dozen mini pizzas, offering flexibility to scale up for larger batches or meal prep without additional complexity.
Common Mistakes in This Recipe
Using too much sauce often leads to soggy bases that lose their structure and become difficult to handle.
Overloading toppings is another common issue. It prevents even cooking and makes the pizzas messy and hard to eat.
Skipping pre-toasting or oiling the base can result in a soft, undercooked bottom that lacks texture.
Overbaking causes the cheese to harden and the bread to become too crisp, reducing overall enjoyment.
Solutions to Common Mistakes
Use a thin layer of sauce to maintain structure while still delivering flavor.
Keep toppings balanced and evenly distributed for proper cooking and easy handling.
Lightly oil or pre-toast the base to create a barrier that prevents sogginess.
Monitor baking closely and remove once the cheese is melted and lightly golden for the best texture.
Nutritional Information (approx. per serving)
- Calories: 180–220 kcal
- Protein: 7g
- Carbohydrates: 22g
- Fat: 8g
- Fiber: 2g
- Sugar: 3g
These mini pizzas provide a balanced mix of carbohydrates and protein, making them a great energy source for active kids.
Cheese contributes calcium and protein, supporting growth and bone health when consumed in moderation.
Vegetable toppings add vitamins, minerals, and fiber, enhancing the overall nutritional profile.
With controlled portions, this recipe allows for a satisfying treat without excessive calories.
Storage Instructions
Store leftover mini pizzas in an airtight container in the refrigerator for up to three days. Keep them in a single layer to maintain texture.
For longer storage, freeze them individually and store in freezer-safe bags for up to one month.
Reheat in the oven or air fryer to restore crispness rather than using a microwave.
If packing for lunch, allow them to cool completely before storing to prevent condensation.
Suggestions
Serve these mini pizzas with a side of fresh fruit or yogurt for a balanced meal.
You can create a DIY pizza station where kids choose their own toppings, making it interactive and fun.
For a healthier version, use whole wheat bases and load up on vegetables.
You can also experiment with different sauces like pesto or white sauce for variety.
Seasonal Relevance
These mini pizzas are perfect year-round, adapting easily to seasonal ingredients and preferences.
In summer, use fresh vegetables for a lighter, refreshing version.
During winter, opt for heartier toppings like chicken and cheese for a comforting meal.
They are also ideal for school seasons, fitting perfectly into daily lunchbox routines.
Final Words
Kid-friendly mini lunchbox pizzas are a smart solution for busy days when you need something quick, reliable, and satisfying.
They strike the perfect balance between convenience and homemade quality, making them a favorite for both kids and adults.
With endless customization options, they never feel repetitive and can be adapted to suit any taste.
Once you try them, they’ll quickly become a staple in your kitchen—simple, practical, and consistently delicious.
Frequently Asked Questions
Can I make these mini pizzas ahead of time?
Yes, you can prepare and assemble them in advance, then refrigerate or freeze before baking. When ready to serve, bake directly from chilled or frozen, adjusting the baking time slightly. This makes them ideal for meal prep and busy schedules without compromising taste.
What’s the best bread to use for mini pizzas?
Mini burger buns and English muffins work best due to their structure and size. They hold toppings well and crisp nicely when baked. You can also use small pita breads or sliced baguette pieces depending on availability and preference.
How do I keep mini pizzas from getting soggy in lunchboxes?
Allow them to cool completely before packing to prevent moisture buildup. Using a lightly toasted or oiled base also helps maintain texture. Packing them in breathable containers or wrapping in foil keeps them fresh without trapping excess steam.
Kid-Friendly Mini Lunchbox Pizzas Recipe
10
minutes10
minutes220
kcalKid-friendly mini lunchbox pizzas are quick, fun, and delicious. Made with soft bread, rich pizza sauce, and melted cheese, these bite-sized treats are perfect for lunchboxes, snacks, or easy meals, offering great flavor with simple ingredients and minimal effort.
Ingredients
6 mini burger buns or English muffins
1 cup pizza sauce
1½ cups mozzarella cheese, shredded
2 tablespoons olive oil
1 teaspoon dried oregano
½ teaspoon salt
½ cup cooked chicken, shredded (optional)
½ cup pepperoni slices (optional)
¼ cup black olives, sliced (optional)
½ cup bell peppers, finely chopped (optional)
¼ cup sweet corn (optional)
½ teaspoon chili flakes (optional)
Directions
- Preheat oven to 180°C (350°F) and line a baking tray.
- Slice buns or muffins in half and arrange on the tray.
- Brush lightly with olive oil to prevent sogginess.
- Spread a thin layer of pizza sauce on each base.
- Sprinkle mozzarella cheese evenly over each piece.
- Add desired toppings like chicken, vegetables, or pepperoni.
- Sprinkle oregano and optional chili flakes for flavor.
- Bake for 10–12 minutes until cheese melts and turns lightly golden.
- Remove, cool slightly, and serve or pack for lunch.
Recipe Video
Notes
- Avoid using too much sauce to keep the base from becoming soggy.
- Do not overload toppings for even cooking and easy handling.
- Pre-toasting or oiling the base improves texture and crispness.
- Let pizzas cool before packing to prevent moisture buildup.
- Customize toppings based on kids’ preferences for better appeal.